more infos on www.arbosurfboards.blogspot.com
the stringers we use are all sitka spruce from robbins timber in bristol. they come in a lenght of ca. 5500mm ready machined to a thickness of 35x25mm and in good quality with very few defects and nice straight grain. we only have to thickness them down to 35x22mm and scarph them to the required length. before scarphing the lengths together we coat them in epoxy and round off the corners that are going to be facing inwards. doing this before scarphing makes handling much easier.
we find the quickest way to coat a lot of stringers at once is to clamp them flat together, apply resin with a roller or brush and take them apart once the epoxy is gelled so they do not get bonded together. don’t wait too long… we coat on face side (35mm) first, coat the opposite 35mm side, then round of the corners and do the rounded side at last. the second narrow side is left bare and gets a quick saturation coat before the planking sheets get glued on with spabond.
routering the corners where easy on a simple router table set up but even easier freehanded with this priceless little fella :
for the scarph joints we used a 1:12 ratio which were easily cut on the radial arm saw with a little jig.
clamping them together in a jig with spabond from sp systems… 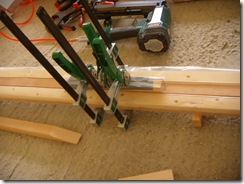
…and out come enormous lengths of spruce …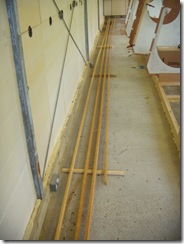
…with a nearly invisible joint line. 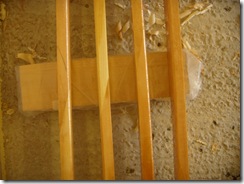
shame that none of that wood will be seen in the finished boat…
i wonder why the cops have not been here yet. a well insulated greenhouse, the light is on till late at night, owned by a dutchman… i would think some marihuana growing is happening there.
when we first set up the bulkheads we just located them on their correct position, in the right height and perpendicular to the centreline at the base. they were still able to lean for or backwards and to twist between sheer and keel line.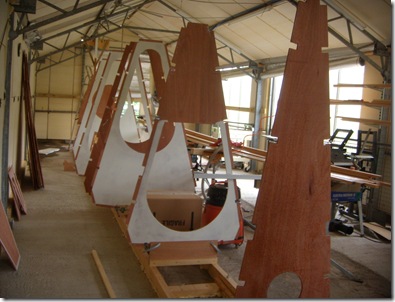
with a temporary keel we stopped the bulkheads from leaning and fixed them plum in position. the laser we used earlier to establish a centreline and to set the bulkheads level was helpful again. 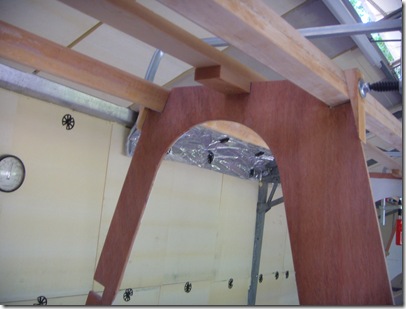
on the picture above you can see the temporary keel in the middle and the sitka spruce keel stringers before they are glued in.
some of the bulkheads, specially the ones with a quite big cut out in the middle and therefore narrow at some places, were not stiff enough to remain straight under the load of the keelstringers. some bulkheads were slightly bowed because the flocoat cured whilst they were leaning against a wall and the epoxy fixed their slight bow. with the help of additional stringers on each side we straightened them up again.
we clamped the stringers in position and used laser, plum bob and tape measure to do fine adjustments until all bulkheads were straight and plum. in order not having to do all that again we marked the bulkhead locations on the stringers. when it came to glueing the stringers in place all we had to do was to get everything to the marked position.
to keep accessibility into the hull easy for a long time, we only glued in the stringers on one side of the hull and left the other side more or less open. you are going to see more of that in the next posts.
this is this weird guy who seems to be on a lot of the photographs i take of the building process. one of the rare pictures where he is wearing more than just the headphones and the glasses…
if you need some nice pottery, he is the man!
the first thing we did when we set up the bulkheads, was to locate their exact position fore and aft and mark it on the longitudinal members of the strongback perpendicular to the centreline. using a long tape measure prevented accumulative errors. with a little arrow and a second line we marked if the bulkhead was to be set forward or aft of the stationline.
we build the catamaran upside down and to keep everything level we had to rise most of the bulkheads as can be seen in the picture above. the two floats have a negative sheer so the highest point of the sheer is located somewhere amidships and not like in traditional hulls at the stem or transom. the station/bulkhead closest to this highest point we sat on the strongback which we assume the baseline. from the drawings we could then establish the height of the support risers for the remaining bulkheads.
a quick and easy way to do this was to create slots from three strips of ply. the “sandwiched” layer of ply is cut to the required height and the two face layers a bit oversized. so the bulkhead can slide in this created slot and can be clamped or screwed in position.
all bulkheads had waterlines and centrelines cut by the cnc router at swallow boats so with the help of a laser it was easy to align them. at this stage we weren’t to worried about having the bulkheads fixed plum as we were using the stringers at a later stage to locate them in their correct position.

 all bulkheads were cut for us at swallow boats in cardigan, a bit less than an hour drive from our shed.
 on the three bulkheads you can see on the picture above. i tried out an epoxy system commonly used in surfboard building called resin research and is distributed in the uk by seabase in cornwall. according to their website, the resin has:
 we did two coats on the black bottom and the transom first, removed the masking tape and did the topsides. there it didn't matter if we were dripping or painting on the black bottom as it will be covered up by the glass laminate on the inside and shouldn't be seen through the black gelcoat to the outside.
 we used PU-glue to fix the crosspieces to the floor first but to make it a rigid structure we will drill additional long screws into the concrete floor. last thing we want is a moving strongback.
 That's what the seams looked like after the first pouring of the glue.
 The heatgun was also quite handy when cleaning up after the pouring. In our opinion it was easier to pour more glue into the seams than needed to make sure it is filled. That created a ridge on top of all the seams which needed to be taken off. Just heating it up with the heatgun and then slicing it off with a spatula or an old plane blade worked quite well. It gives a finish like on the picture above on the covering board seam.
 Here you can see how it looked after the second pouring using heatgun and the small metal container.
 And slowly it starts to look nice...


